Perfect Pumpkin Pie: Homemade Taste with Minimal Effort
The quest for the perfect pumpkin pie is a beloved autumn tradition, especially as Thanksgiving approaches. For many, it's the undisputed centerpiece of the dessert table, carrying the weight of tradition and expectation. But what if we told you that achieving a pie that tastes entirely homemade, rich with warm fall spices and a creamy texture, doesn't require an entire day in the kitchen? The secret lies in a clever blend of traditional flavors and smart, time-saving techniques. This guide will show you how to create a pumpkin pie so good, so effortlessly, that you'll understand why we boldly call it "perfect."
Unlocking the Secret to the Perfect Pumpkin Pie
Calling a recipe "perfect" is a strong claim, but one bite of this pumpkin pie will convert even the most skeptical baker. The magic happens when a supremely flaky pie crust meets a luscious, spiced pumpkin filling. The true genius of this approach is that it delivers an authentic, made-from-scratch flavor profile with only a fraction of the typical effort. This isn't about cutting corners on taste; it's about smart baking that maximizes impact for minimal fuss.
At the heart of this effortless perfection is the ingenious use of a refrigerated pie crust. While purists might scoff, a high-quality refrigerated crust is a game-changer. It provides a consistent, flaky foundation without the need for messy flour-dusted countertops, precise measurements, or endless rolling. This head start allows you to channel your energy into perfecting the creamy filling and, if you desire, adding those impressive decorative touches that truly make a pie stand out. It’s the ultimate hack for an easy pumpkin pie recipe that still tastes like a labor of love.
Crafting the Creamy, Dreamy Filling
While the crust provides the stage, the filling is undoubtedly the star of any perfect pumpkin pie. Achieving that velvety smooth texture and deeply aromatic flavor is simpler than you might think, provided you pay attention to a few critical details and ingredient choices.
Essential Ingredient Wisdom for Your Perfect Pumpkin Pie
The foundation of a great pumpkin pie filling begins with the right ingredients. First and foremost, always reach for pure canned pumpkin. This is crucial. Read the label carefully to ensure you're not mistakenly grabbing "canned pumpkin pie mix," which already contains sugar, spices, and sometimes other additives. Pure pumpkin provides the natural base, allowing you to control the exact balance of sweetness and seasoning that defines your perfect pie.
Another common pitfall is confusing evaporated milk with sweetened condensed milk. While both are canned milk products, their roles in baking are distinctly different. Evaporated milk is unsweetened and has about 60% of the water removed, resulting in a richer, creamier liquid perfect for pie fillings. Sweetened condensed milk, on the other hand, is heavily sugared and much thicker. Swapping the two will drastically alter the sweetness and consistency of your pie, leading to an overly sweet and dense result that won't achieve that desired creamy texture. Stick to evaporated milk for a perfectly balanced filling.
Beyond these crucial distinctions, the general rule for most baked goods holds true: mix your wet and dry ingredients separately before combining them. This fundamental technique ensures that all spices are evenly distributed, and the eggs are thoroughly beaten, preventing any clumps of unmixed ingredients. It guarantees a consistently smooth, silky batter that will bake into an exquisitely uniform filling – a hallmark of any truly homemade pumpkin pie.
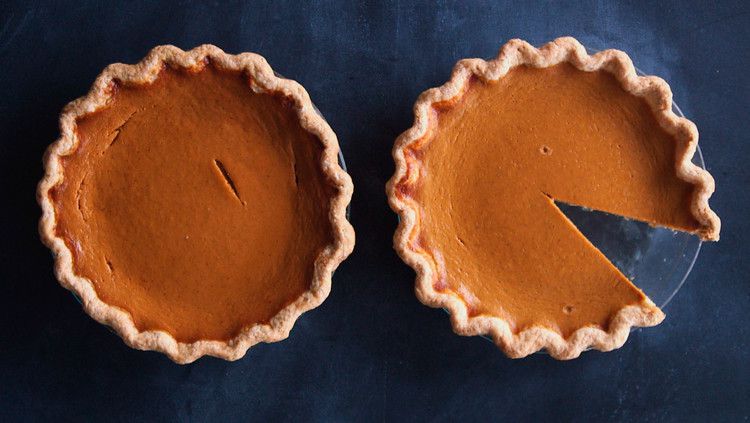
Elevate Your Pie: Presentation and Pro Tips
A delicious pie is wonderful, but an impressive-looking pie is a masterpiece. Taking a few extra minutes to adorn your pie with decorative crust edges can elevate it from a simple dessert to a show-stopping centerpiece. Even with a refrigerated crust, these techniques are surprisingly simple to master and add that undeniable "made-from-scratch" charm.
There are several ways to transform a plain crust edge into something spectacular:
- The Scalloped Edge: This classic look is achieved by placing your thumb and index finger about an inch apart on the outside of the raised crust edge. With your other index finger, gently push the pastry toward the outside, creating a beautiful, wavy pattern.
- The Rope or Pinched Edge: For a more rustic yet elegant look, place the side of your thumb on the pastry edge at an angle. Then, pinch the pastry by pressing the knuckle of your index finger down into the pastry towards your thumb. Repeat this motion around the entire circumference.
- The Forked Edge: Perhaps the simplest and most universally appealing, a forked edge involves pressing a fork into the crust edge, facing inward. Do not press all the way through the pastry. Rotate the fork to always face the center of the pie as you work your way around, creating a neat, ridged pattern.
Mastering one or all of these techniques will ensure your perfect pumpkin pie not only tastes divine but also looks breathtakingly impressive. For even more creative ideas and step-by-step guides to turn your pie into an edible work of art, check out our comprehensive article on Impress Your Guests: Foolproof Pumpkin Pie & Decor Tips.
Mastering the Bake: Doneness and Beyond
Knowing when your pumpkin pie is perfectly baked is another key to success. The easiest and most reliable way to tell if a homemade pumpkin pie is ready is the "jiggle test." Gently jiggle the pie dish (wearing oven mitts, of course!). The outer edges of the filling should appear set and firm, while the very center might have a slight, almost custardy wobble. This subtle jiggle indicates that the pie is cooked through but still moist and creamy. If the entire pie is completely firm and doesn't jiggle at all, it's likely overbaked, which can lead to a dry, cracked filling.
Once your pie passes the jiggle test, the work isn't quite done. Cooling is paramount for a perfectly set filling. Allow your pie to cool completely on a wire rack for at least 2-3 hours, or even longer. This crucial step allows the custard to firm up properly, preventing it from collapsing or cracking when sliced. Rushing this process is a common mistake that can compromise the texture of your otherwise flawless pie. For more in-depth guidance on achieving the ideal doneness and avoiding common baking pitfalls, explore our article: Master the Best Pumpkin Pie: Essential Baking & Doneness Tips.
Beyond the Bake: Serving Your Masterpiece
Once cooled, your perfect pumpkin pie is ready for its grand debut. While it's utterly delicious on its own, a dollop of freshly whipped cream is the quintessential accompaniment. For an extra touch, you can make your own by simply beating together 1/2 cup whipping cream with a tablespoon of powdered sugar and a splash of vanilla extract until soft peaks form. A dusting of cinnamon or a tiny sprinkle of nutmeg can also add an inviting aroma and visual appeal to each slice. This classic crowd-pleaser is not just a Thanksgiving dessert; it’s a warm, comforting embrace of fall flavors that can be enjoyed throughout the season.
There you have it: the blueprint for a perfect pumpkin pie that combines the unmistakable taste of homemade goodness with the practical ease modern bakers appreciate. By focusing on quality ingredients, understanding key distinctions, employing smart shortcuts, and mastering a few simple techniques, you can confidently present a beautiful, delicious pie that will earn you rave reviews. So, go ahead, embrace the season, and bake your way to pumpkin pie perfection!
